Wooden Fairy Story Discs – DIY with Ryobi Australia!

This post is in collaboration with Ryobi Australia
OLYMPUS DIGITAL CAMERA

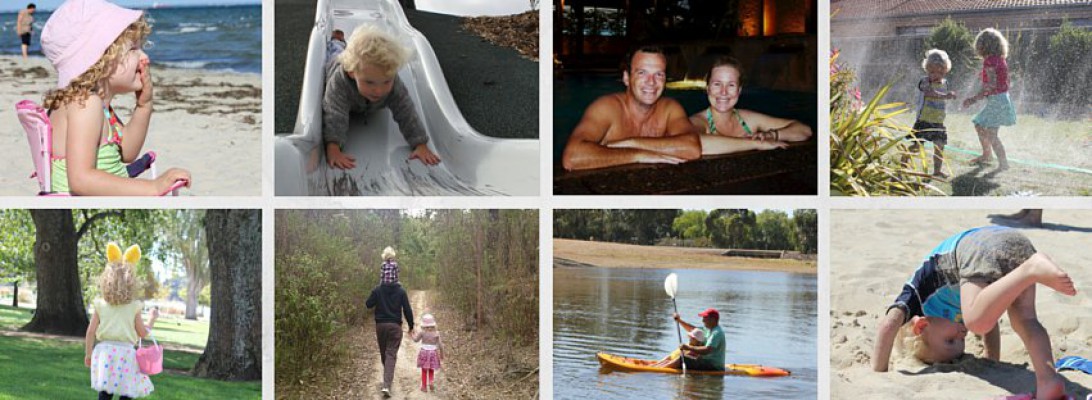
Alegria and Isaac love to play outside! There is nothing better than seeing their imaginations run wild whilst getting a great big dose of fresh air and being in nature! In an age where kids are spending more time on devices, we have been making a concerted effort to swap screen time for green time. To achieve this, we we visit national parks in our local area, go to playgrounds and spend time in our garden.

We have put aside a little area in the backyard, under some trees and in amongst the flowers, for a fairy garden. One of Alegria’s favourite things to do in the fairy garden is to play with our homemade wooden story discs. Wooden story discs, similar to story stones, are great as story-telling prompts for narrative play. They are fun, easy to make and your kids will love them!
OLYMPUS DIGITAL CAMERA

If this is your first DIY project, here are my Top 5 Tips to get you on your way! You don’t need to feel intimidated by DIY, there are many projects that require very little in the way of skill, tools or materials.

GEORGINA’S TOP DIY TIPS!

  1. Pick a simple DIY design – you don’t want to be overwhelmed and never finish. Save the instructions or take a screen shot on your phone for easy reference.
  2. Make sure you get some essential safety gear – safety glasses and hearing protection are a must. Gloves are handy as well!
  3. Ask for help – expert advice is available at stores like Bunnings Warehouse or local hardware stores. Ask your friends, you will be surprised at the hidden skills people have!
  4. Get prepared – make sure you have all the tools and materials you need before you begin. You don’t want to have to stop half way to pop down to the shops again!
  5. Set aside time to DIY – I often work on my projects when the kids are playing in the backyard. They come and check out what I am doing, have a go (if it’s safe) and then go back to playing. It’s amazing how much knowledge they pick up by observing you and participating, where appropriate.

HOW TO MAKE WOODEN STORY DISCS:

As I said, wooden story discs are easy to make, and even easier when you have the right tools!

For the wooden story discs, we stopped by Bunnings and picked out some Ryobi Tools to make the job easier. Isaac was in little boy heaven!

Ryobi Kidding Around Australia 20

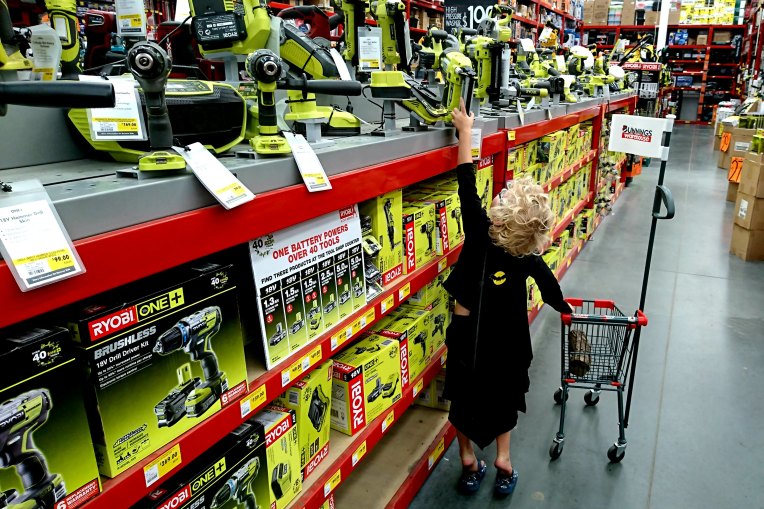
Obviously we had a specific idea of what we were using the tools for, however, we have found that we use them all the time for various DIY jobs and for even lighting the Weber BBQ!

If you are a beginner, don’t be scared! Each tool comes with an instruction manual and there are also online tutorials on how to use all the Ryobi tools on Ryobi TV.

TOOLS WE USED:

MATERIALS WE USED:

  • 64 x 19 mm 3.0 m length of timber
  • Various rubber stamps (we chose fairy themed but you can choose anything!)
  • Versamark ink
  • Embossing powder

DIY STEPS:

STEP 1: MEASURE TWICE, CUT ONCE!

OLYMPUS DIGITAL CAMERA

Before cutting your timber, do a quick measurement to make sure your stamps will fit! Mark out where you want to make your cuts along the timber.

Ryobi Kidding Around Australia 8.jpg

Ryobi Kidding Around Australia 12.jpg

STEP 2: GET CUTTING!

OLYMPUS DIGITAL CAMERA

Always remember your safety protection (safety glasses and hearing protection at a minimum) and get cutting! The Ryobi 2000W 254mm Slide Compound Mitre Saw With Laser was easy to use, and I highly recommend getting the stand. The saw has just enough safety precautions that you know you won’t cut off a finger (always a bonus!) and not too many that makes using it cumbersome. The laser makes cutting a straight line, exactly where you want it, a breeze!

OLYMPUS DIGITAL CAMERA

STEP 3: SAND AND SEE!

Now that you have your little bits of timber, it’s time to shape them! You could use a pencil to mark out the basic shape you want your discs to be or be like us and see what shape it becomes! Alegria really loved helping out with this task. With the right safety equipment and supervision, there is no reason not to include your kids in your DIY tasks!

OLYMPUS DIGITAL CAMERA

We used the Ryobi 200W Corded Multi Tool Kit sanding attachment and rounded the corners off the timber pieces. We used a vice to hold our discs (and an old sock as the vice was marking our timber!) and smoothed all of the edges so that they were safe for even the littlest of fairies.

Ryobi Kidding Around Australia

The Multi Tool is such a handy tool to have, although in hindsight, I would have used the Ryobi 370W Belt and Disc Sander as this was a job that took a long time! The Belt and Disc Sander would definitely be faster!

OLYMPUS DIGITAL CAMERA

STEP 4: GET SOME INK!

OLYMPUS DIGITAL CAMERA

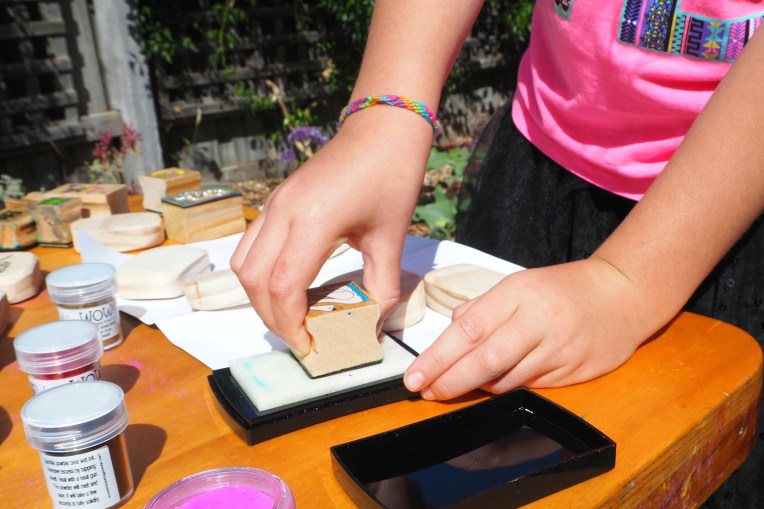
Using your chosen rubber stamps, coat the stamp with Versamark ink and stamp it onto your wooden disc. Make sure you are very careful and don’t move the stamp once it is on the wood or the embossing powder will stick to it and ruin your image!

Ryobi Kidding Around Australia 15.jpg

STEP 5: SPRINKLE FAIRY DUST (EMBOSSING POWDER)!

As soon as you have stamped your wooden disc, you need to sprinkle embossing powder on it. You need to be quick as you don’t want the ink to dry as your powder won’t stick!

OLYMPUS DIGITAL CAMERA

Don’t waste your powder – pour the excess back into your container or use a piece of paper folded in half as a funnel.

STEP 6: TURN UP THE HEAT!

Activating the embossing powder is for adults only! Let me say that again! The heat gun is HOT so the kids need to step away!
Ryobi Kidding Around Australia 17.jpg
Now that they are at a safe distance, heat the embossing powder until it begins to change. It sort of bubbles and melts. The Ryobi 2000W Corded Heat Gun has a red light so that you can target specific spots and you don’t burn anything. The silver end gets hot, so be careful after you have finished to avoid burns. The gun itself is easy to use and as I said earlier Tim uses it to light his Weber BBQ all the time so it is a handy addition to your tool box.

STEP 7: ENJOY!

The kids can use the wooden story discs however they chose! There’s no right or wrong way to play!
OLYMPUS DIGITAL CAMERA

If you are looking for ideas, the kids can use the discs for:

Math Play: The discs can be used in sorting or grouping activities. Children can count how many people (or fairies), animals or food items they have or make shapes by lining up the discs into circles, squares and even in long lines.

Story Telling: Children can tell a story based on a single image or use another disc to further the story. Children can do this independently or as a group taking it in turns to tell a story or add another sentence to the group story.

Imaginative Play:  The discs don’t have to be used exclusively in the garden, they can be used as:

  • obstacles on the car or train track
  • characters in the dollhouse
  • guests at a tea party

Of course, there are many ways your children will find to play with these wooden story discs and you can put what ever images you like on them so they can be tailored to your child’s interests.

OLYMPUS DIGITAL CAMERA

Acknowledgements – This post was brought to you in collaboration with Ryobi Australia. Kidding Around Australia were supplied with the tools required for this project and as always our opinions are our own.


Please note all details quoted are correct at the time of publishing. All details are subject to change without notice and Kidding Around Australia takes no responsibility for information contained in this post. Please check the appropriate website to ensure that information is still correct and current.

ALL PHOTOGRAPHIC IMAGES ON THE KIDDING AROUND AUSTRALIA WEBSITE ARE THE EXCLUSIVE PROPERTY OF THE KIDDING AROUND AUSTRALIA AUTHORS. ALL IMAGES ARE SUBJECT TO COPYRIGHT AND CANNOT BE USED WITHOUT WRITTEN PERMISSION FROM KIDDING AROUND AUSTRALIA.

ICE BALL SMASH – A Smashing Halloween Activity

ICE BALL SMASH

img_20161028_115047

HOW TO CREATE AN ICE BALL FOR SOME SMASHING FUN!

If you are looking for a great activity that the kids can help prepare and then expel some energy on, this one is for you!

As Halloween is fast approaching, we added a spooky dimension to our ice balls however you could use what ever small toy you like!

For this activity, you will need to prepare the balloons the night before as it needs 10+ hours to freeze.

WHAT YOU WILL NEED

_20161028_132631

  • Balloons
  • Small toys (we used rubber spiders, but you could use marbles, pom poms, shells, pebbles or beads – depending on your theme)
  • Water
  • Hammer
  • Food colouring (optional)

MAKING THE ICE BALL

OLYMPUS DIGITAL CAMERA

Let the kids choose their favourite coloured balloons and gently push the toy inside. Once it’s almost there, if you blow the balloon up it should fall to the bottom! If you are adding food colouring then add a few drops now.

OLYMPUS DIGITAL CAMERA

Fill the balloon with water (you might need to help the kids by putting the balloon on the tap and holding it in place). Fill it slowly and don’t make it too big (we found out the hard way!). Remove it from the tap, let the excess air out and tie off the balloon. Then place it into your freezer (we tried different positions but didn’t notice much of a difference in the end product).

Leave to freeze overnight.

OLYMPUS DIGITAL CAMERA

When your kids are ready for a smashing time, take the balloon out of the freezer and cut the balloon off the ice.

OLYMPUS DIGITAL CAMERA

It’s time to head outside!

OLYMPUS DIGITAL CAMERA

THE ICE BALL SMASH

Find a spot on the grass and let the fun begin!

OLYMPUS DIGITAL CAMERA

Obviously, you have to supervise your kids and help the little ones use the hammer to avoid accidents – but you knew that!

OLYMPUS DIGITAL CAMERA

The Ice Ball Smash is a great activity that can be customised any way you like! In fact, you could add a wrapped chocolate (frozen mini Mars Bar anyone?) – now that would be the perfect trick and treat combination!

More trick or treat tips can be found on the Carnival Cruise Tips blog post HERE.

Take a look at their Halloween Trick or Treat video filmed onboard Carnival Spirit, in their very own candy lolly shop Cherry on Top. Yummo!

Happy Halloween!

#kiddingaroundaustralia #carnivalhalloween #carnivalspirit

Spotlight Cosplay Costumes for Oz Comic-Con

This post is sponsored by Spotlight Stores

If you follow us on Facebook or Instagram you will have seen that I am busy making my Rey costume for Oz Comic-Con.OCC2015-Logo (1) (1)

Oz Comic-Con celebrates all that is cool, awesome and nerdy where attendees can unleash their inner geek! There are celebrity guests, all of the latest merchandise, games in the gaming zone, cosplay costumes and heaps of fun for the kids!

As Cosplay newcomers, we decided to go with a Star Wars theme for our family and we were so happy that Payno was able to join us. Payno has the most amazing Chewbacca costume that he wore last Halloween (that’s Tim as the Shark!) and we wanted to match him for Oz Comic-Con!wookie halloween.jpg

Spotlight Stores were kind enough to support us in this endeavor and we have chosen three costume options that you could also try at home.Z01200_rounded

Firstly, for the children we purchased ready-made costumes. Alegría has chosen to go as Princess Leia and Isaac chose Kylo Ren. This option is by far the easiest, however, I did have to take Alegría’s dress up because it was too long.yaya and isaac comic con.jpg

For Tim’s costume, we modified existing clothing to make his Han Solo costume. I made some small changes to a top that I found at the op-shop and Tim will be wearing some awesome boots I found at the back of my dad’s wardrobe! I don’t think Tim was too thrilled about me adding “blood stripes” to the sides of his pants! Payno has made a utility belt and pistol that he is kindly lending to Tim and I got him a wig from Spotlight’s Sparty section! tim

My Rey costume was by far the most time consuming to make but it was also the most rewarding. Spotlight have a range of patterns, however, I made my own using newspaper. In hindsight, it would have been easier to buy the pattern! I am proud to say that I made the entire costume (except for my non-regulation Doc Martins … I know the die-hard Cosplayers won’t forgive me, but I wasn’t buying new boots for the day!).mumma.jpg

Spotlight will also be on hand at Oz Comic-Con in Melbourne to sell Cosplay fabrics and DIY costume supplies as well as offering tips, tricks and advice for getting your next costume started. They will also provide fans with a fix-it station to mend broken costumes and will be giving out store vouchers – hopefully I don’t have any wardrobe malfunctions!

I am putting together a DIY tutorial so you can make your own Rey costume soon – watch out for that next week!

So tell us, are you going to Oz Comic-Con? Are you going in costume? Please come up and say “Hi” if you see us!

More Information

www.spotlightstores.com.au

www.ozcomiccon.com


Please note all details quoted are correct at the time of publishing. All details are subject to change without notice and Kidding Around Australia takes no responsibility for information contained in this post. Please check the appropriate website to ensure that information is still correct and current.

ALL PHOTOGRAPHIC IMAGES ON THE KIDDING AROUND AUSTRALIA WEBSITE ARE THE EXCLUSIVE PROPERTY OF THE KIDDING AROUND AUSTRALIA AUTHORS. ALL IMAGES ARE SUBJECT TO COPYRIGHT AND CANNOT BE USED WITHOUT WRITTEN PERMISSION FROM KIDDING AROUND AUSTRALIA.


Spotlight National Craft Month VIP Event

For as long as I can remember, I have been crafty! My Nanna was crafty, my Mum is crafty and now my kids are crafty!

You will have seen on Instagram some of my projects (I am especially proud of the Alegría and Isaac’s Santa sacks)! It is my aim to start sharing tutorials with you so that you can do simple (and not so simple) creative projects with your children at home and on the road.

IMG_6230

Spotlight and Kids Business invited us to a VIP event specifically for bloggers recently to introduce us to some exciting crafting trends as well as to celebrate Spotlight National Craft Month which is happening throughout the entire month of April 2016.

25903884961_53b79ccbe7_k

Spotlight is an amazing place to unleash your creativity! They provide their customers with do-it-yourself supplies and know-how to learn new skills and techniques in sewing, baking, craft and dressmaking.

During the event, we enjoyed new product previews, live demonstrations and interactive workshops hosted by some amazing presenters.

The guest speaker was Pip Lincolne from Meet Me at Mikes who spoke about her new book “Craft for the Soul- How to get the most of your creative life” and the benefits of crafting for wellbeing. I loved Pip’s analogy of families crafting together from an excerpt from “Little House on the Prairie” , I fondly remember my childhood connection to craft.25644944060_ef606758a5_o.jpg

It was fantastic to go around the room, from table to table, meeting the presenters and doing hands-on activities. The creative buzz within the room was palpable!

Trixi Symonds (www.colouredbuttons.com) demonstrated easy sewing projects for kids – and I loved it! I made a felt toy and the kids have already put in their orders for a giraffe, elephant and tiger … best I get the felt and buttons out now!spotlight 4

Zorrato Designs demonstrated Wilton Colour Right, Colour Swirl and Treatology systems and I fell in love! I love cake decorating and now I know how to do the perfect triple swirl on top of a cupcake!spotlight 5

Carla Hackett (www.carlahackett.com) showcased hand lettering techniques and the new Heidi Swapp Mini Mic Machine. So pretty!spotlight 1.jpg

Rachel Burke (www.imakeyouwearit.com) demonstrated pom-pom making techniques using a horse-shoe shaped cutout as opposed to the traditional “donut” cutout we all learned as children! Rachel’s “Apomogies”- the art of saying you’re sorry with a pom-pom are fantastic!spotlight2

Alyce Keegan (www.kitandclowder.com) – Alyce is the Australian Craft Educator of the Year and 2015 Australian Small Business of the Year finalist and teaches over 9,000 people her colouring techniques for skin, hair and clothing and paper crafting. She is very talented – me, well … I have some practice to do!spotlight 3.jpg

If you would like to get involved, there will be two key in-store events taking place at all Spotlight stores:

Saturday 2 April 2016

Saturday 23 April 2016

Each in-store event will showcase hands-on DIY demos, free project sheets, awesome giveaways & prizes, plus amazing weekend-only specials. (Click on the photo above of the event you are interested for more information!)

Check out some fun projects on the Spotlight Stores project database and in their Get Creative magazine.

Join me in getting crafty this month and don’t forget the hashtags #spotlightncm and #imadethis to show of your creations!25644900090_1e954e1c03_k.jpg

Thank you to Spotlight and Kids Business for inviting me to this amazing event – I had a wonderful time!


Please note all details quoted are correct at the time of publishing. All details are subject to change without notice and Kidding Around Australia takes no responsibility for information contained in this post. Please check the appropriate website to ensure that information is still correct and current.

ALL PHOTOGRAPHIC IMAGES ON THE KIDDING AROUND AUSTRALIA WEBSITE ARE THE EXCLUSIVE PROPERTY OF THE KIDDING AROUND AUSTRALIA AUTHORS. ALL IMAGES ARE SUBJECT TO COPYRIGHT AND CANNOT BE USED WITHOUT WRITTEN PERMISSION FROM KIDDING AROUND AUSTRALIA.